Data import: Handling CSV files
A collection of instructions. Consider this a friendly “there’s a lot that can be wrong with your file, let’s investigate” response from the Operating customer support team.
Written By Matti Parviainen
Last updated About 2 months ago
Basic import of time entries (along with People, Clients and Projects)
Recommended tools
You’re probably exporting the CSV contents from some other application. It’s going to be in the raw CSV format. When you open it in Excel, Numbers or Google Sheets, the spreadsheet application will try to apply formatting to it and save it in their own file format (such as .xlsx).
If you don’t need to do any spreadsheet magic, we recommend you use a plain-text editor such as VS Code, EditPad Lite, or BBEdit. These apps show the file in “raw” format rather than try to create a table, interpret the headers, guess what number is a date and so on.
Recommended workflow
Manipulate the CSV file in a plain-text editor whenever possible. Do not change the file encoding – that’s a sure way to break the äöé characters that are in your person and customer names.
Make sure you have all of the required columns in the file. Up-to-date examples and instructions are found inside the Operating app, for example here: https://use.operating.app/settings/import-data
When you’re done editing the file – using your tool of choice – before you upload it, doublecheck to see how it looks using a plain-text editor. The encoding may have been broken in the last export.
Frequently encountered errors
files have commas (,) or semicolons (;) in them and they are not wrapped in “quotes”
“quotes” are created using funny characters
lines have differing number of columns - some cells are missing
some numbers are 0.5 and others 1,5
dates are 2024/11/21 or 2024/21/11 rather than 2024-11-21
personID for the same person changes from one import to another, creating duplicates
make sure you’re using unique unchanging identifiers for the person
Review what you’ve imported
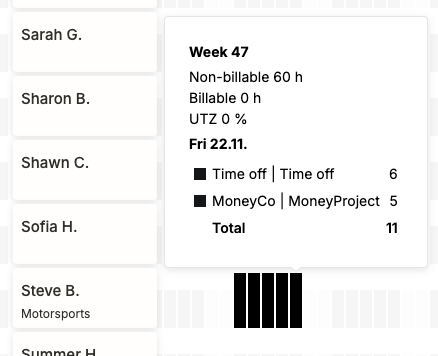
The best way to see what the time entries contained – per person, per day – is the Utilization Metrics report. Hover over the days to see time entries:
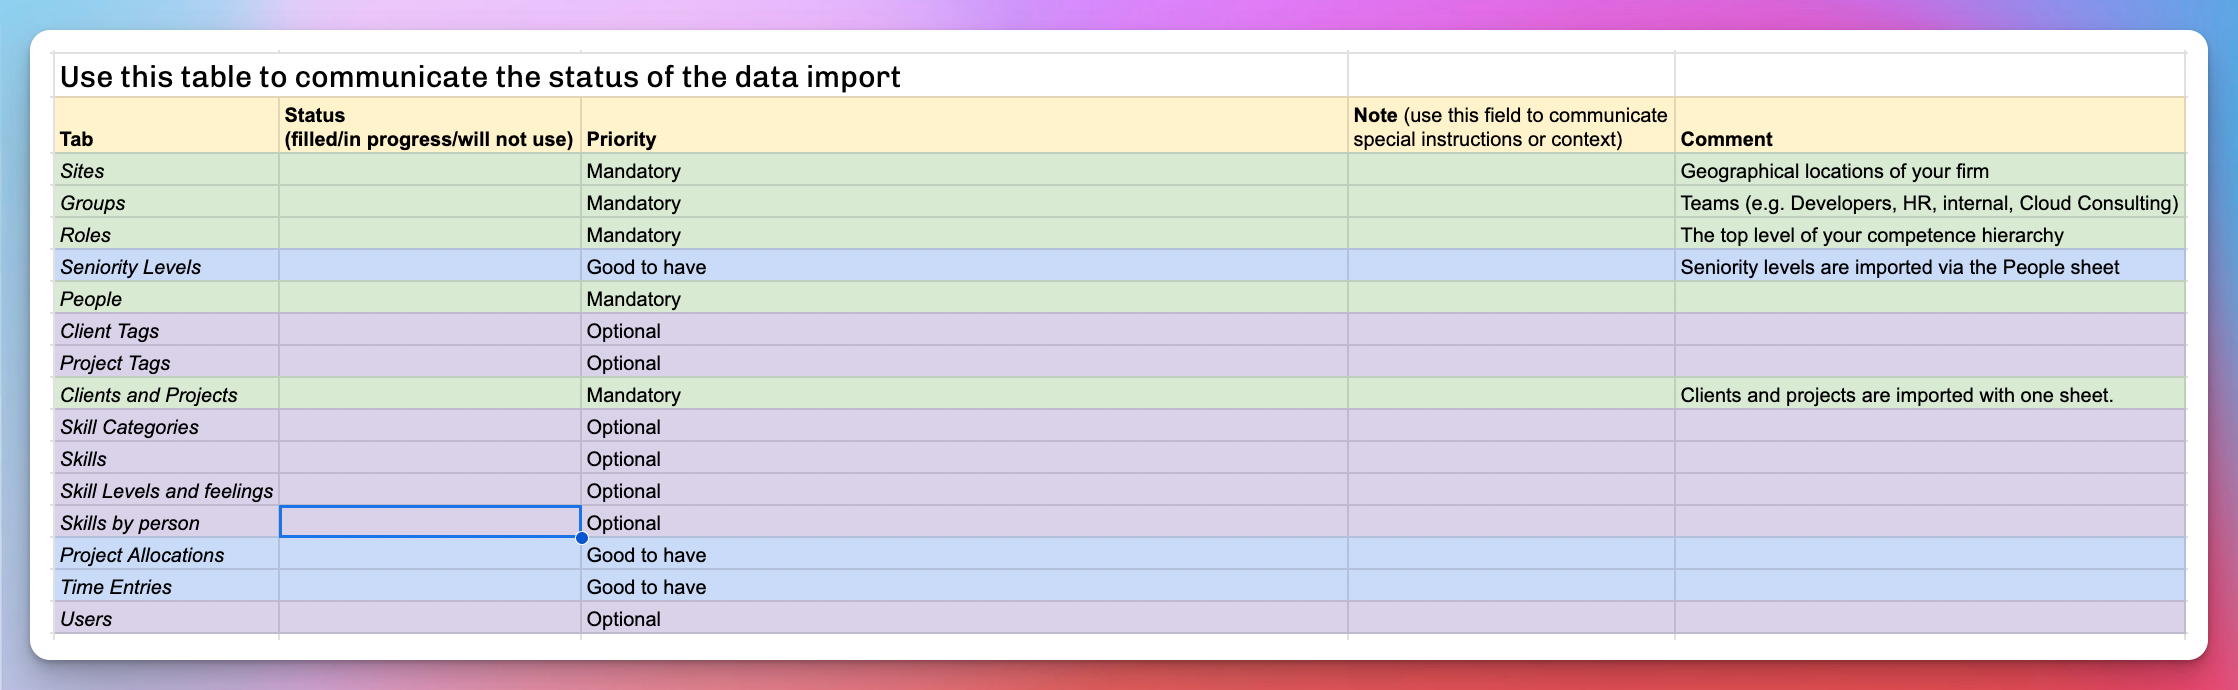
Download the Data Import Excel
You can access the data import spreadsheet behind this link (Gsheet, view only). Please make a copy of the spreadsheet, so you can use it for your own purposes.
The “Other data” tab
Currently in invite-only use (as of December 2025)
With this power-user tool, it’s possible to populate a huge amount of data in Operating. However, in order to avoid duplicates and data loss, you must be careful to do things in the correct order and make sure to use the same external id’s for different things.
Ping us at support@operating.app if you need access.
Advanced import tricks
If you’re reading this, you’ve most likely been vetted by team Operating to have sufficient spreadsheet skills and technical understanding of the Operating data model.
The “Other data” import feature is behind a feature flag – this means it has to be separately enabled for you before you can access it in https://use.operating.app/settings/import-data
Following the instructions in this document may feel odd or repetitive. It’s because some of the initial imports have to be done in a specific sequence so that the mapping between clients, people, projects, allocations and time entries remain accurate. For some things, the best way to proceed is to do a little bit of old-fashioned manual work.
Populate an Operating tenant from scratch
The Operating team provides you with a data import spreadsheet.
Ask support@operating.app to create a new blank tenant (account).
If you’ve already tested Operating in a sandbox and want to keep it for testing purposes, ask us to rename the old tenant “yourcompany-test”.
You should follow this order to avoid errors with data references:
Organizational data like sites and roles. Add groups and seniority levels in the app itself.
People (and related data)
Make sure you persist the Person id’s (from your source system, or if you don’t have anything, something likely unique to the person, such as email address)
Skills (Optional)
Client and project tags (Optional)
Clients and projects
Make sure you persist the Client id’s (from your source system, or if you don’t have anything, something likely unique to the customer company, such as client name)
Make sure you persist the Project id’s (from your source system, or if you don’t have anything, something likely unique to the project)
If you would like to use the external deal ID’s (from your CRM) as external project ID’s, follow the instructions here.
Remember the additional value mapping for each column where e.g. billing type values needs to be mapped (e.g. fixed price equals fixed-price)
Project allocations
Here, you will use the Person and Project id’s you introduced in steps 2 and 5.
(Optional) Time tracking data with tasks
Here, you will use the Person and Project id’s you introduced in steps 2 and 5.
Remember to use TaskID for each Task, otherwise the import will succeed but time entries will not have Tasks related to them
Use CRM deal ID’s as external project IDs
Scenario: you’ve connected your CRM (e.g. HubSpot) to Operating and now have plenty of projects in there. The projects have been added by the CRM integration and the best identifier for each of the projects is the CRM Deal ID – assuming that only one Deal corresponds to each Project.
Export all of your projects in https://use.operating.app/projects → the “…” button on top right → Export as CSV. The columns you will need are
Project ID
Client name
Project name
Project number (the rolling numbering Operating does automatically (1,2,3…)
Deal External IDs
The resulting CSV file will look like this (likely much longer):
Project ID,Client name,Project Name,Project Number,Deal External IDs
9444,Ford,Test Deal,13,250563001572
In the above file you can probably spot that Test Deal has the external ID present.
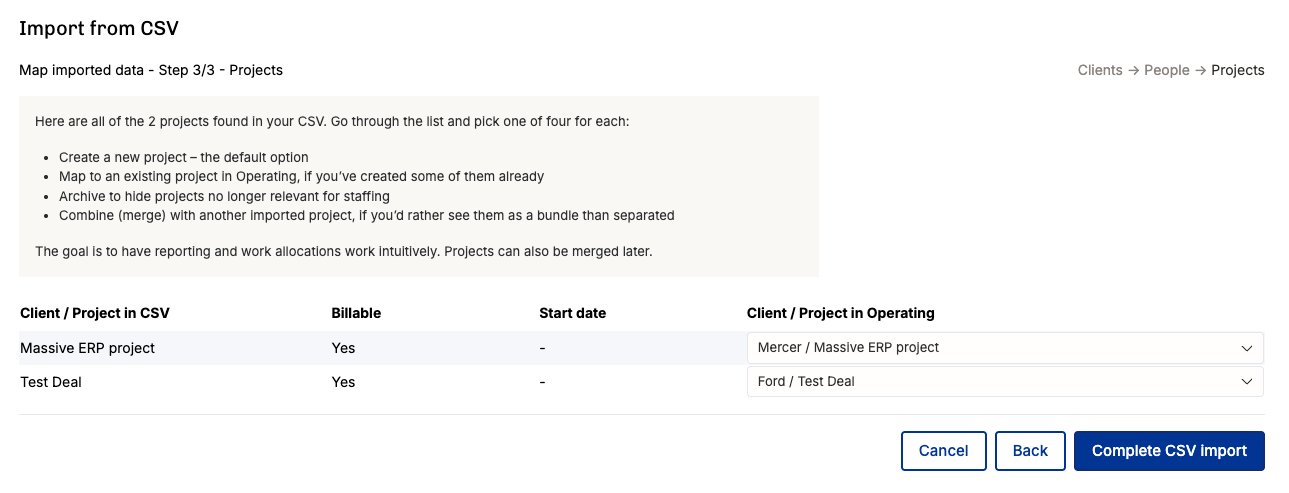
Now, go to the Other data tab in Manual data import and choose upload Clients and Projects.
In the upload, the only columns that matter are Project name and the Deal External ID as the Project ID. Mapping will look like this, and the dropdown menu will auto-suggest the right project assuming that all project names are unique. If you have lots of projects with the same name for different clients, bring the client name along in the export to avoid confusion.
This is what a Test Deal looks like afterwards – two connections, one from HubSpot, another from CSV.

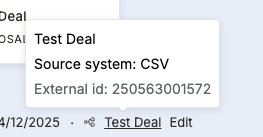
With this, the Test Deal’s external project ID will be the same as the external deal ID. This may help you map things like project allocations to the right project.
Data Import CSV Field & Value Cheat Sheet
If the problems persist and you’ve lost hope, please send us the file (or the first few lines of it) to support@operating.app – thanks!